Friday, December 31, 2010

Making Transparencies (Overlays) with the Imagine

Today I want to share with you my design project for Creative Critterz Imaginations blog.

I so love my Imagine and I couldn’t wait to show you this new technique. In today’s video, we will be using the Imagine to print on transparencies to create our own overlays. The overlays turn out perfect and look like you purchased them. Complete instructions are on the video.


The card base is cut at 3 ¾ inches by 5.25 inches. I used the rectangle from the George cartridge and cut it at 5.3 inches and flood filled using the Audrey cartridge…my new favorite! Trim the overlay to 3 ¾ x 4 ¼ inches and attach using vellum glue dots. Add rhinestones and a rub-on and the card is done! My kind of card.

Recipe:
George Cricut Cartridge
Audrey Imagine cartridge
Kaiser Rhinestones
Ink Jet transparencies
Vellum Glue dots
Lavender card stock

For more videos, please visit my blog or my YouTube Channel.
Happy New Year!

Posted by Picasa


Thursday, December 30, 2010

Terrifically Talented Thursday!

Welcome to the last Terrifically Talented Thursday until next year! Here are my weekly picks.


I am a huge fan of Jennifer McGuire’s inking series and I just discovered her blog. This photo is from her card gallery. Be sure to check out all her amazing cards! She is one mega talented stamper.

For those of you that received the new Smiley Cartridge as part of the free Gypsy download, I am excited to announce that Provo Craft has posted a copy of the handbook. Enjoy!

For a larger than life birthday calendar by Lisa Johnson, visit Poppy Paperie. I love this project and resolve to make one for me! Check out her blog if you have time for lots of great designs!

I consider Diane from Capadia Designs to be an expert on Design Studio and visit her blog frequently . She just posted a wonderful video on how to use Design Studio to group and resize. Yahoo!

To learn how to make the cutest ribbon flowers, check out this video by Melissa Samuels. They are super cute and easy to make!

Thanks for stopping by and hope you are having a terrific Thursday! Stop in tomorrow for fun new video.

Happy New Year!


Linda

Wednesday, December 29, 2010

Using Layers to Design on Your Gypsy

I am so loving my Gypsy! I received several emails asking me to do a video on how to use the layer function and here it is. So sorry it has taken me so long! In this video, we will be making a quick and easy New’s Year’s Day card using the layer function.


Here is my Gypsy video on how to use hidden contours just in case you missed it.


Happy Holidays!

Monday, December 27, 2010

Glitter Paste for Your Valentine’s Day Projects

I am taking the day off to spend with family, so I thought I would re-post one of my all-time favorite videos. I was tired of having my glitter flake off on my cards and scrapbook pages, so I decided to try making glitter paste. Now my glitter stays put and has a nice shiny finish. In addition, this paste does not curl your paper and is very easy to make. Glitter paste would be perfect to use on your Valentine’s Day cards. For complete instructions, scroll down and watch the video. Enjoy and have fun making glitter paste.


I will be back on Wednesday with a fun new video.

Happy Holidays!

Linda

Friday, December 24, 2010

Jewelry Box and Card

If you are looking for a last minute jewelry box, here it is. I made this quick and easy box using the Wrap It Up Cartridge and my Imagine. The snowflake box is on page 68 of the Wrap It Up manual and I used the fit-to-page option. It is flood filled with digital paper from the Imagine More cartridge. I added glitter and a ribbon and was done. I just had to make a quick gift card to go with the mini jewelry box.


Hope you are having a wonderful holiday. I have the best followers and I am extremely grateful to each and every one of you for your support! I am so looking forward to 2011 and have more fun projects and videos planned.

Happy Holidays!

Linda

Posted by Picasa

Thursday, December 23, 2010

Terrifically Talented Thursdays

Welcome to the last Terrifically Talented Thursday before Christmas! Every Thursday, I showcase five blogs, websites, or posts that I think you will enjoy. Here are my weekly picks.

I love this quilling card by Mari aka Momo. So cute. This could be my new hobby. Mari is so amazing and talented!


The Cuttlebug Spot has a terrifically talented design team and they have created amazing New Year’s cards that are a must see. Can you believe it…2011 is almost here?

Do you have any used dryer sheets? If so, you may want to try this technique posted by Splitcoast Stampers. I am so going to try this on a Valentine’s card.

Kristina Werner created this beautiful Valentine’s card using buttons. It gets me in the mood to start making Valentine’s cards. Hope you enjoy her video.

I just discovered this fun stamping blog named Simply Stamped. Maile Belle’s designs are simple, yet elegant.

Thanks for stopping by and hope you are having a terrific Thursday! Stop in tomorrow for one last quick Christmas project.

Happy Holidays!

Linda

Wednesday, December 22, 2010

How to Emboss and Cut Suede (Velvet) Paper with Your Cricut and Cuttlebug Machines

In today’s video I will show you how to use your Cuttlebug to emboss suede (velvet) paper and how to use your Cricut to cut the paper. We will also make a cute embossed tag…just in time for Christmas.


Thanks for visiting and Happy Holidays!

Monday, December 20, 2010

Fa la la la la……

I picked up the Meow cartridge during Wal-Mart’s Black Friday sale and was determined to use it to make a Christmas card. We have two cats, Izzy and Jackson so this was a must buy! BTW…Jackson is a pure black cat with attitude!


Last June, Enfys from Going Buggy made a very similar “Just a Note” card and I couldn’t wait to adapt it. Thanks Enfys for your great design. The base card is from Christmas Cards and cut at 6 inches. I cut the cat and layers at 4 inches. The paper strip measures 2 x 4 ½ inches.

Have a great week and stay tuned for a fun new video!

Linda


Posted by Picasa

Friday, December 17, 2010

Christmas Tag

Today I want to share with you my design project for Creative Critterz Imaginations blog.

Can you believe it? Only one week until Christmas Eve. I am busy wrapping gifts and making a few last minute tags like the one below. I am so thankful that my Imagine makes the task easy! I also used a fun new product called Wobbles that add movement to my card! I so wish you could see it move!


First I cut a 2.8 inch circle using the stock circle shape and flood filled it with digital paper from Snow Angels. I then cut a stock scalloped shape at 3.2 inches and flood filled using the same cartridge. The stamp is from my stash and I colored it using watercolor pencils and a fun technique that I posted on my blog a couple of weeks ago. Just in case you missed it, I thought it might be helpful to post it again. This technique makes your regular and water colored pencils look like expensive markers.


Recipe:
Snow Angels Imagine cartridge
Rubber stamp from Great Impressions
Signo uni-ball pen for white dots
Ribbons from my stash, dimensionals, glitter glue, and adhesive

Thanks for visiting and Happy Holidays!


Posted by Picasa

Thursday, December 16, 2010

Terrifically Talented Thursdays

Welcome to another Terrifically Talented Thursday! Every Thursday, I showcase five blogs, websites or posts that I think you will enjoy. Here are my weekly picks.

Tim Holtz just completed a 12 tags of Christmas Series and this amazing tag was from day nine. Click here to view his series. They are listed on the right side of his blog.


Okieladybug’s Scrap N More is a must see blog. She created a vintage Santa card using ProMarkers and an amazing stamp. She is one talented and fun lady!!

Custom Crops is once again providing free scrapbook elements. I so love getting free digital elements! Thanks Custom Crops.

Speaking of free, Jak Heath is also giving away free digital paper that is unbelievably elegant and perfect for the season. Please check out her blog while you are there. You will leave inspired.

One of my new favorite blogs to visit is Passionately Artistic and I think it will become one of your favorites too! Be sure to scroll down to see a recap of their 12 Days of Christmas projects. They are so unique and gorgeous.

Thanks for stopping by and hope you are having a terrific Thursday!

Happy Holidays,

Linda

Wednesday, December 15, 2010

Quick and Easy Envelopes and Liners

I know everyone is busy finishing their holiday cards, so I thought it would be a good time to talk about envelopes. I love using the Cricut to make envelopes and thought I would share a couple of my favorites. I used double sided paper to add a special touch, and to avoid cutting out liners.


The envelope on the left is perfect for square cards and can be found on the Walk in My Garden cartridge. The scalloped square is on page 78 of the Accent Essentials manual. Of course, I had to add faux stitching using my Signo pen.

The envelope on the right is my go to envelope for A2 cards and is on page 79 of the Plantin manual. I love the rounded corners. Super quick and easy! I used two punches to create the closure.

I also like to make envelopes and liners using the Martha Stewart Score Board and the Score Pal. I made this video several months ago, but thought it might be useful to post it again.


If you want to see more ideas on how to decorate your envelopes click here to see another video.

Thanks for visiting and good luck with all your cards and envelopes! Ho Ho Ho!


Posted by Picasa

Monday, December 13, 2010

Cricut and Martha Stewart to the Rescue

We have an annual candy making party at our house and make hand molded candy. I tried to find candy boxes to purchase, but no luck, so I made my own. Did I mention that it was a last minute idea? I used the Christmas Cheer Cartridge to cut the windows and covered the openings with acetate. The Martha Stewart Score Board made the process easy! I made over 30 boxes in a very short time! Here are a few of the boxes and some photos from the day!


Chocolate artists at work!


Sampling of the final product before packaging.


Thanks for visiting!

Posted by Picasa

Friday, December 10, 2010

Gift Cards

Today I want to share with you my design project for Creative Critterz Imaginations blog. I made this cute gift card using the new Holly Jolly cartridge.


The gift card is on page 7 of the Cindy Loo manual and is cut at 6 ½ inches. I love that this card has slits in it that fit most gift cards. I used my Argyle Cuttlebug folder for added texture. Next, I used my Imagine to make the background. The background cut is on page 7 of the Nursery Tails Art Cartridge. This image was cut at 4 inches and I only cut the first layer using purchased Christmas paper.

The letter carrier is cut at 3 ¾ inches and is from the Holly Jolly Cartridge. I used a stamp for the Ho Ho, added glitter glue, and a metal rhinestone to the spokes. I also used my Swiss Dot Cuttlebug folder to add texture to his hat and top. Lastly, I added more rhinestones and tied a quick knot.

Recipe:
Cindy Loo Cricut cartridge
Nursery Tails Imagine cartridge
Bazzill cardstock
Christmas cardstock from DCWV Christmas Combo
Swiss Dots and Argyle Cuttlebug folders
Delta Ho Ho Ho rubber stamp
Ribbons from my stash, dimensionals, glitter glue, Kaiser rhinestones and adhesive


I know this is not a Christmas gift card, but I made this for a friend and I just had to share.

The gift card is on page 46 of the Wild Card manual and is cut at 4.2 inches. I used the Best Friends Imagine cartridge paper on page 35 to flood fill the image and then printed using beige paper. Best Friends image is on page 13 of the manual and is cut at 2 inches. I used dimensionals to attach the layers.

Recipe:
Wild Card Cricut cartridge
Best Friends Imagine cartridge
Bazzill Card stock, beige
Ribbon from my stash, dimensionals, and adhesive

Thanks for visiting!

Posted by Picasa

Thursday, December 9, 2010

Terrifically Talented Thursday

Welcome to another Terrifically Talented Thursday! Every Thursday, I showcase five blogs, websites or posts that I think you will enjoy. Here are my weekly picks.

Samantha Casey made these super adorable Peachy Keen Ornaments. Be sure to visit her blog to see more amazing ornaments and more! She is mega talented!


Nadia from A Beautiful Mess created a three part series on using the Imagine to make cupcake toppers, cupcake wrappers, invitations, bottle wrappers and much more. They all coordinate perfectly!

Jewel from Little Scrap of Heaven created a charming home décor project using Jolly Holidays that is perfect for Christmas. Be sure to visit her blog for directions. I so wish she would make me one for Christmas!

I can’t wait for the 2011 Hero Arts Catalog to be released! Click here if you would like to see several sneak peaks. It is going to be good!!

I love Chic n Scratch’s videos and this one is so cute. She makes an adorable candy cane Christmas card box. I love it and plan to make one soon!

Thanks for stopping by and hope you are having a terrific Thursday!

Wednesday, December 8, 2010

How to Make Your Colored Pencils Look Like Expensive Markers.

In today’s video, I demonstrate how to make your regular and watercolor pencils look like you used expensive markers. There are several color pencil videos on YouTube; however my technique is slightly different.

We will also be making this card . A special thanks to Joy from Every Day Cricut for this cute card idea, I so scrap lifted! Hope you enjoy the video!


Thanks for visiting and I hope you enjoy this fun and easy technique!
Posted by Picasa

Monday, December 6, 2010

Jolly Holidays Christmas Card

I love the new Jolly Holidays Cart and could not wait to use it. I saw a similar card in the November/December issue of PaperCrafts magazine and had to make it using this cartridge. Super cute and so easy!


The base card measures 3 ¾ x 5 ½ inches. The inside liner was cut at 3 ½ x 5 ¼ inches. The girl is cut at 4 ¼ inches. For the top of the card, I cut the marquee # 1 from the Storybook cartridge at 4 ½ inches. I then trimmed the marquee and used a stamp for the sentiment. Lastly, I add glitter and attached a Wobble. You can never have too much bling or movement!

Have a great week and stay tuned for a fun new video!

Posted by Picasa

Friday, December 3, 2010

Fun with Winter Punnies!

Today I want to share with you my design project for Creative Critterz Imaginations blog. I love My Pink Stamper’s Winter Punnies! They are so fun and are a natural addition to my Cricut Imagine projects. Robyn’s stamps are extremely well made and so easy to use. In fact, they were so easy to use I just had to make two cards to share with you!


This is another one of my quick and easy cards. The base card measures 5 inches x 7 ¾ inches. The inside liner was cut at 4 ¾ x 7 ½ inches using my favorite digital paper from the Snow Angels cartridge. I cut two 4 inch icons on page 30 of the Snow Angel manual and hand trimmed the outer layer. I used dimensional s to attach the outside layer.

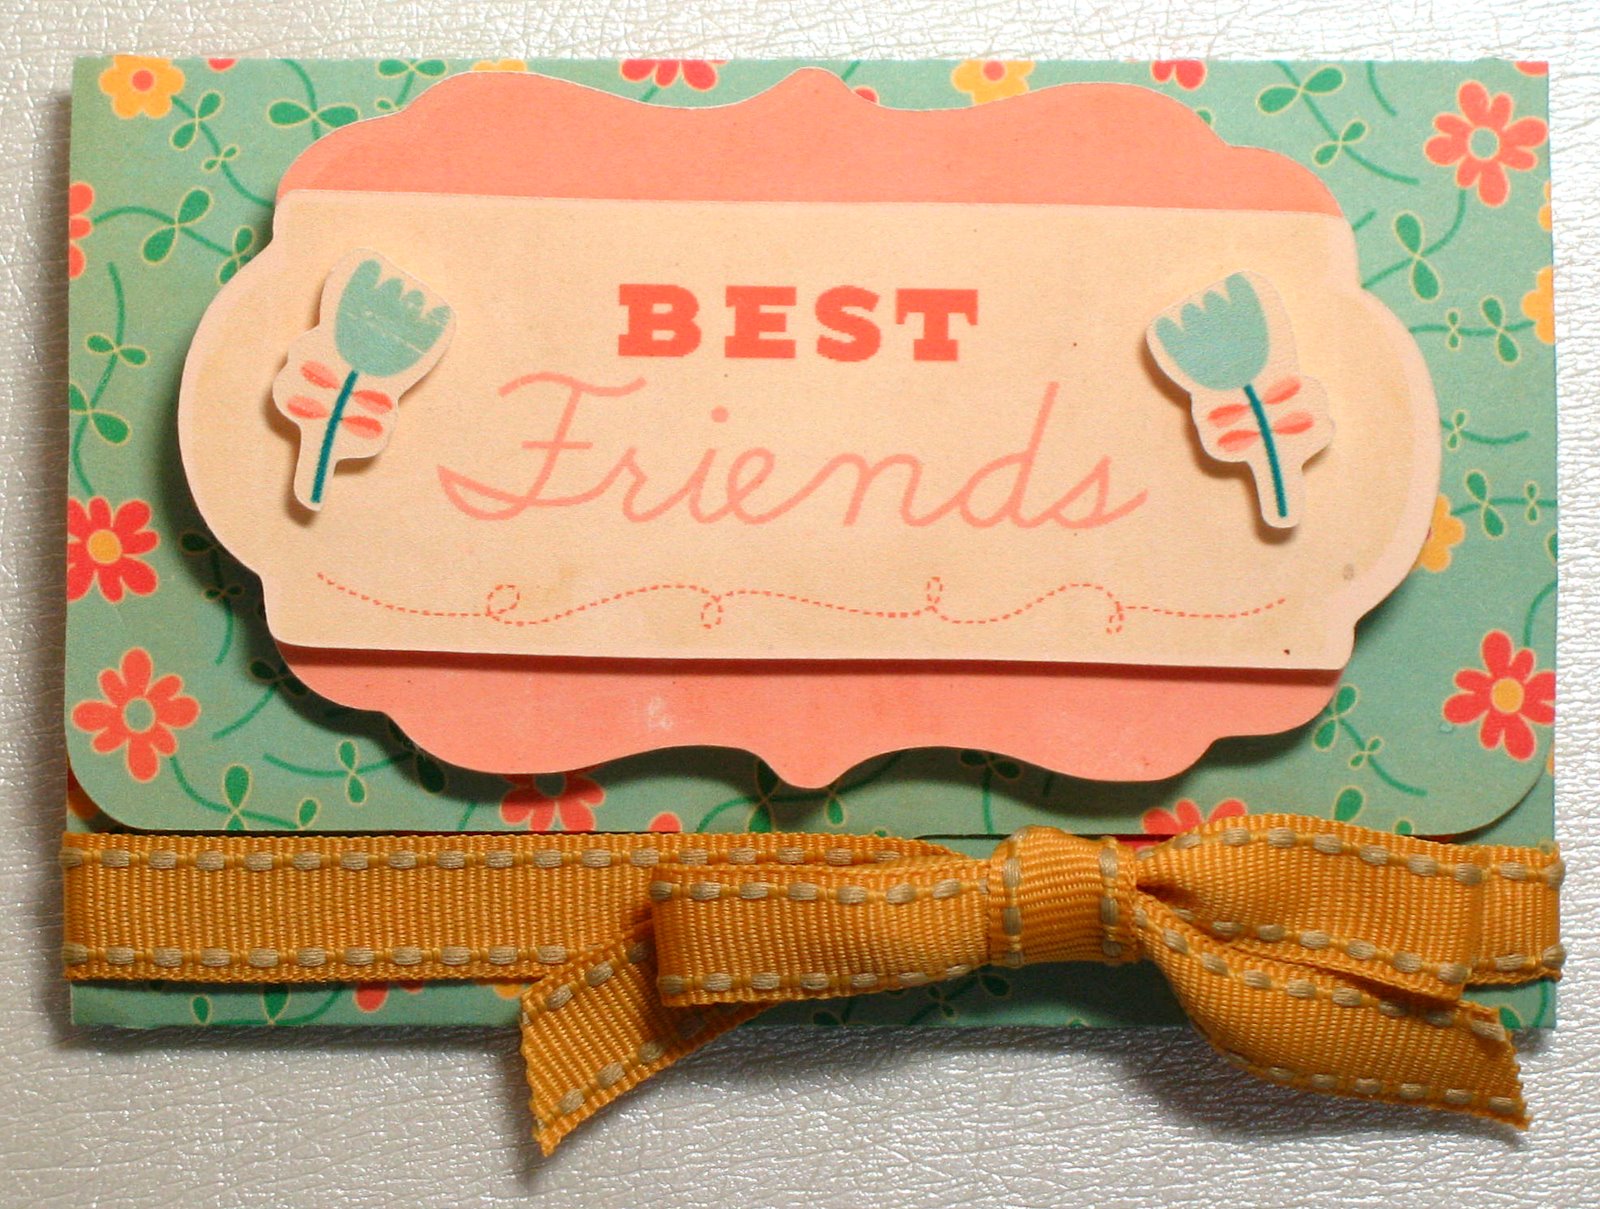
Next, I cut a turquoise strip of paper 2 x 4 ¾ inches and used my Martha Stewart’s Double Loops Punch Around the Page on both sides. Thanks to My Pink Stamper, I had the perfect sentiment, plus two cute snowflakes. Lastly, I added a bow.

Recipe:
My Pink Stamper Winter Punnies
StazOn Black Ink (any ink will work).
Snow Angel
Bazzill Card stock
Ribbons from my stash, dimensionals, mini glue dots, and adhesive
Martha Stewart’s Double Loops Punch Around the Page


I saw a similar card in the November/December issue of PaperCrafts magazine and had to make it using the Imagine. Super cute and easy!

First, I flood filled nine 1 ½ inch squares using paper from the Snow Angel cartridge. The Imagine makes matching papers easy! The outside card measures 5 inches x 5 inches and the inside liner measures 4 ¾ x 4 ¾ inches. Be sure to round the corners. I tied the ribbon around the liner before attaching it to the base card.

For the sentiment, I cut a paper strip measuring ¾ x 2 ¾ inches and notched the edge. I measured ¾ of an inch and 7/8 from the left side and scored on both lines. Before folding, I stamped the sentiment. Lastly, I attached a button tied with embroidery floss.

Recipe:
My Pink Stamper Winter Punnies
StazOn Black Ink…any ink will work
Snow Angel
Bazzill Card stock
Ribbons from my stash, dimensionals, mini glue dots, adhesive, corner rounder
Button and embroidery thread from my stash

PS In case you are wondering why there is no Fab Five Friday post, I thought it would be fun to move things around on my blog and add an extra card or project post on Fridays and move my Fab Five Friday post to Thursdays and be renamed Terrifically Talented Thursday in honor of all the talented bloggers and sites that are featured! Here is a link to the first Terrifically Talented Thursday post.Thanks for visiting!

Posted by Picasa

Thursday, December 2, 2010

Terrifically Talented Thursdays

I thought it would be fun to move things around on my blog and add an extra card or project post on Fridays. My Fab Five Friday post will move to Thursdays and be renamed Terrifically Talented Thursday in honor of all the talented bloggers and sites that are featured! Thanks again for your wonderful support and here are this week’s Terrifically Talented Thursday links:

Laura from the Paper Trail is totally amazing! She made these plate glass flowers out of left over bubble wrap and fabric. Too clever!!


Kate from Small Bits of Paper designed the cutest gift tags plus a matching gift box. These would make the perfect Christmas gift. Be sure and check out her blog while you are there. It is amazing!

For those of you that know me, you know I take my glitter seriously. Dawn from Dawn’s Stamping Thoughts has a fabulous two-part glitter tutorial that will keep the glitter on your card and off your carpet! Click here for part one and here for part two.

Amanda made an adorable travel mug using cuts from the Cricut. So cute and what a terrific gift idea. Thanks Amanda for sharing!

I love this project by Giselle Varela. She made a shaker card using glow in the dark glitter. This is a new twist on the shaker card that you just have to see to believe.

Thanks for stopping by and hope you are having a terrific Thursday!

Wednesday, December 1, 2010

Using Action Wobble Springs to Add Motion to Your Cards and Instructions to Make Your Own

In today’s video, I will show you a new product called Wobble Springs. They are perfect for adding motion to your cards. The Wobble Springs are the best ever and I highly recommend that you buy them. But, if you run out in the middle of the night, I will show you how to make your own using common crafting supplies. Also a special thanks to Emma from My Creative Time for the gift card idea! She is amazing!


Thanks for visiting and have a great day!

Posted by Picasa

Total Pageviews

blog design by VK Design Company