Showing posts with label Silhouette. Show all posts

Wednesday, May 30, 2018

Make it in Minutes Monday

Welcome to Make it in Minutes Monday. I thought it would be fun to feature quick and easy cards and projects that take only minutes to make, but look like you spent more time making them.


This project did take a little longer to make, but it was so worth it. I made this box card for my niece's shower this weekend and I can’t wait!


I used the Baby Crib Box Card (#131495) that I purchased from the Silhouette On-line Store to make this charming card. I used metallic paper for the rattle and diaper pin and added a heart that I enlarged to the sides. I also added a strip of pattern paper to the front insert and rhinestones to the rattle.


I cut the sentiment using a die and the label is a sticker.

Thanks for stopping by and have a marvelous Monday!

Monday, April 30, 2018

Make it in Minutes Monday

Welcome to Make it in Minutes Monday. I thought it would be fun to feature quick and easy cards and projects that take only minutes to make, but look like you spent more time making them.


I used my Silhouette Cameo to make this adorable magic slider card. I purchased the Magic Slider Card Cake image (#260768) from the Silhouette on-line store.


This card features a magic slider and print and cut images. I did not have a transparency setting on my Canon printer, so I used the Photo Paper Glossy II setting and it worked perfectly.

Below is a step by step video tutorial from Lori Whitlock, the designer!


This card looks difficult, but only took minutes to make.

Thanks for stopping by and have a marvelous Monday!

Tuesday, February 6, 2018

Make it in Minutes Monday

Welcome to Make it in Minutes Monday.  I thought it would be fun to feature quick and easy cards and projects that take only minutes to make, but look like you spent more time making them.


This shaker card was so easy to make. I used the traditional method to make this card, but I do not like the added bulk. I prefer the method, I described in this post.


I cut the Lacey Floral Valentine Heart(#72864) using my Silhouette Cameo, from a piece of 4 x 5.25 inch card stock.  My image measured inches 3.756 x 3.570.  I used the eraser tool to remove the outside cutting line.

Thanks for stopping by and have a marvelous Monday!

Tuesday, January 30, 2018

Flower Burst Card

I recently made several cards using the same cut. If you made the cards that I posted during the last few weeks, you will already have the blue square cut. If not, I have provided step by step directions below. I saved the easiest card for last. This project made tons of cards!


I cut the flower shape (#2064) that I purchased from the Silhouette on-line store out of the center of a piece of blue 4.5 x 4.5 inch cardstock.


I attached a piece of white card stock to the back of the blue piece. Then, I cut the rectangle stitched blue frame and attached. Next, I attached the blue square to a 5x5 inch top folded white card. For this card, no dimensional squares needed. Super easy!

Thanks for stopping by and have a wonderful day.

Friday, January 26, 2018

Fab Five Friday

Welcome to Fab Five Friday. For those of you that are new to this blog, every Friday I showcase five blogs, websites or posts that I think you will enjoy.


I adore this valentine treat box created by Mitsyana. Check out this post for all the info! Dove chocolates fit perfectly!


If you are a quilter or want to be one, check out this DIY post!


Be sure to check out this post too!


This is one of the best videos I have seen comparing black inks! I learned so much!


A special thanks to Kelly for creating a detailed tutorial on how to become a print and cut pro. I love using my Silhouette to do print and cuts. Her project is perfect too!


I watched all of the Creativation videos from ScrapTimeVideos This one from Graphic 45 was my favorite. Be sure to check out her channel for all of her videos!

Thanks for visiting and have a fabulous Fab Five Friday.

Wednesday, January 10, 2018

Flower Burst Layered Card

Last week, I made several cards using the same cut. If you made the inlaid card that I posted several days ago, you will already have the pink square cut. If not, I have provided step by step directions below.


I cut the flower shape (#2064) that I purchased from the Silhouette on-line store out of the center of a piece of pink 4.5 x 4.5 inch cardstock. I did an internal offset using my Silhouette Software and then cut the design out of the center of a blue piece of 4.5 x 4.5 inch cardstock. I did another internal offset and cut the image from the center of a piece of 4.5 x 4.5 inch orange cardstock.


I attached all 4.5 inch squares and then backed them with a piece of green cardstock. I cut the rectangle stitched pink frame using one of my dies and attached to the square. I used dimensional tape to attach the completed piece to a 5 x 5 inch white top folded card. I cut the word thanks three times using one of my dies, and glued them together before attaching the sentiment to my card. You could also use your Silhouette or Cricut to cut a sentiment.

This card was the most complicated of the set. Stay tuned, I have one additional card to share with you. I saved the easiest to the last.

Thanks for stopping by and have a wonderful day.

Wednesday, January 3, 2018

Flower Burst Glitter Card

Last week, I made several cards using the same cut. If you made the inlaid card that I posted several days ago, you will already have the orange square cut. If not, I have provided step by step directions below.


I cut the flower shape (#2064) that I purchased from the Silhouette on-line store out of the middle of a piece of orange 4.5 x 4.5 inch cardstock. You could use a Cricut flower image or die.


I attached a piece of Scor-Pal Double sided adhesive to the back of the orange square and then added glitter. I removed the remaining backing sheet and attached the orange panel to a white square.

I cut the rectangle stitched orange frame using one of my dies and attached to the orange square. I used dimensional tape to attach the orange piece to a 5 x 5 inch white top folded card. Lastly, I cut the word "Congrats" three times using one of my dies, and glued them together before attaching the sentiment to my card. You could also use your Silhouette or Cricut to cut the sentiment.

Thanks for stopping by and have a wonderful Wednesday.

Monday, October 16, 2017

Halloween Treat Bag

I was very excited to learn that I can buy Dreaming Tree files through Cricut! I love their files and this makes it so easy!


I can’t believe how study this bag is! Leo has thought of everything. He even has an assembly video that is so easy to follow.


I added some rhinestones to the collar and his eyes for extra bling. This bag turned out super cute!

For this card, I used the Pizza Box file (#61145) that I purchased from the Silhouette on-line store.

Thanks for stopping by and have a marvelous Monday!

Monday, August 21, 2017

Forever Friends

A few weeks ago, Jennifer McGuire made several cards using the June Hero Arts of the month kit and I fell in love with the kit. I rushed to order, but they were sold out. I was determined to make similar cards using my Silhouette Cameo. This is my second card and I love the safari theme.


Since, I did not have the stamps that came in the kit, I used the safari file (#18473) that I purchased from the Silhouette on-line store.

Then I used my new distress oxide inks to do a blend that looked like a sunset. I used fired brick, spiced marmalade and fossilized amber. Once the ink dried, I cut a rectangle measuring 2 ¼ x 4 ¼ inches. I am loving the new distress inks! They blend perfectly!


I used the print and cut feature to do the sentiment. The font is Forget Me Knot HMK and sized at 21.35, but any font you like will work. I added a black border and my finished card measures 4.5 x 5.75 inches.

Have a wonderful day!

Wednesday, July 5, 2017

Get Well Card using the Cameo 3 and Silhouette Studio V4.0.837 Software

I made this card for my nephew and love how it turned out. Normally, this card would be quick and easy to make. It actually took me five hours to make, because I installed the new Silhouette Studio software version V4.0.837 on my newer Cameo 3 machine. I currently use an older version of the software on my Cameo 2. This is a long post, so you may want to grab some coffee!


I purchased the A2 Card Get Well Soon file (#132392) and used paper from my stash.
In my opinion, Version 4 is the biggest software update ever. The installation went smooth, but there is  a  learning curve. The menus have been completed redesigned. I was lucky and received the new Silhouette Handbook free of charge. It was very helpful, but I also found some additional resources you might want to explore. Here is a post from the Silhouette Blog explaining more about the handbook.

If you have the V4 software installed, you can go to the help menu and access a new manual for version 4. This manual is not as comprehensive as the handbook, but very useful. Or, you can click here if you want to read a pdf version of the manual even if you don’t have version 4 software installed.

My first challenge was using the built-in Bluetooth wireless. It worked once, but continued to be unreliable, so I disabled it. Next, the optical sensor did not read my registration marks for the print and cut sentiment portion of my card. I added another light source and it worked perfectly. I need to take a break before I spend more time on the Bluetooth challenge.


I also had a challenge with the cut settings. Some of the machine settings that I used on my Cameo 2 with older software had to be changed, including the speed, thickness and blade depth. The new send panel and cut screens are very different and took me a while to learn.

I finally got the Cameo 3 and v4 software to cut the tiny holes in this card. I am running two different Cameo machines using two different versions of the software, on two different computers. I really wanted to test the differences, so I tried numerous settings and compared the results. It took some time to get the Cameo 3 to cut as precisely as my Cameo 2 machine, and I am still struggling a bit, but it is getting better.

Now for the good news and more great resources.

I am starting to love the new detachable floating panels and the dynamic top tool bar. These changes will make designing with V4 even faster. I need to play more with the new tracing tools, the walk through tutorials, new project start-up options, and the much anticipated object on path feature. I love having the dual carriage and can’t wait to make more projects.

One of my all-time favorite resources is the Silhouette Message Board. Click here for more information. I love this message board and they have been a great help to me. I have been going there for help since I bought my very first Silhouette.

This post from the Silhouette Blog is also very helpful.

If you upgrade, or are a new user, the past Silhouette tutorials will look very different than the new v4 software. Silhouette School’s recent post explains the differences. Another informative post from Melissa is on how to transition from V3 to V4.

What about future upgrades?

Silhouette School recently wrote a great post on the eleven new features in Silhouette Studio V4.1. Also the send panel is getting a major overhaul. I am thrilled because it is  a little complicated. I figured out the various cut functions, but it took some time.

Sorry for the long post, but I wanted to share my Cameo 3 and v4 thoughts.

Have a wonderful day!

Wednesday, June 21, 2017

Pizza Box Birthday Card

I have a friend that loves pizza so I thought I would make her a pizza card in a box. I think this card turned out great!


For this card, I used the Pizza Box file (#61145) that I purchased from the Silhouette on-line store.


I hand cut liners for the box and added a happy birthday flourish (# 49867) sentiment to the inside of the box. I cut two pizza background circles and glued them together to make the card.

Thanks for stopping by and have a wonderful Wednesday.

Wednesday, June 14, 2017

BBQ Grill Box Card

I am giving this card as a thank you to a friend that loves to grill. He recently gave us six different bottles of his homemade beer, so I wanted to make a special card.

For this card, I used the BBQ Grill Box Card (#136229) that I purchased from the Silhouette on-line store.

Since he loves beer, I thought the saying was appropriate. I left room on the bottom to sign my card. This card took a while to make but it was worth it!

Thanks for stopping by and have a marvelous week!

Monday, February 6, 2017

Make it in Minutes Monday

Welcome to Make it in Minutes Monday. I thought it would be fun to feature quick and easy Valentine cards and projects that take only minutes to make, but look like you spent more time making them.


For this project, I used the Small Heart Chocolate Box (#55074) that I purchased from the Silhouette on-line store.


Instead of using this adorable box for candy treats, I decided to fill it with colorful office supplies. This box would be perfect for a gift of candy of other treats. The valentine’s paper is from a Recollection’s pack that I purchased at Michaels. Click here to purchase a larger version of the box.

Thanks for stopping by and have a marvelous Monday!

Monday, January 23, 2017

Make it in Minutes Monday

Welcome to Make it in Minutes Monday.  I thought it would be fun to feature quick and easy Valentine cards that take only minutes to make, but look like you spent more time making them.


For this card, I used the Valentine Frog with Hat Holding Candy PNC (#55074) that I purchased from the Silhouette on-line store.  The frog is 3.435 inches wide and 3.904 inches tall.  The pink layer measures 4 inches by 5.25 inches and was cut using a die from My Creative Time.  I love the stitched dies!


I used dimensional squares to attach the image and was done.  The finished card measures 5.5 inches wide x 4.25 inches tall.

Thanks for stopping by and have a marvelous Monday!
Wednesday, January 18, 2017

Love Birds

I will be back next Wednesday with a fun new video, but had to pop in to share this quick and easy card.


For this card, I used the Lovebirds image (#118184) that I purchased from the Silhouette on-line store. I sized the images to fit the 4 inches x 5.25 white layer.

I embossed the white layer using an embossing folder from Anna Griffin. I love the lace look! I added a few small rhinestones and was done. The finished card measures 5.5 inches wide x 4.25 inches tall.

Thanks for stopping by and have a wonderful Wednesday!

Monday, January 16, 2017

Make it in Minutes Monday

Welcome to Make it in Minutes Monday. I thought it would be fun to feature quick and easy Valentine cards that take only minutes to make, but look like you spent more time making them.


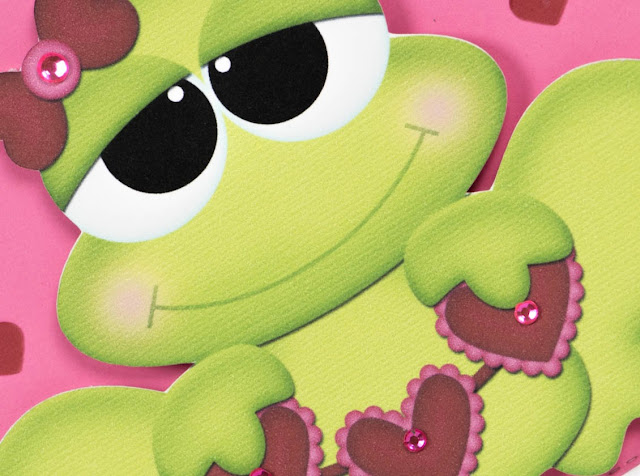
For this card, I used the Valentine Frog Holding Hearts PNC (#55073) that I purchased from the Silhouette on-line store. The frog is 4.345 inches wide and 3.616 inches tall. The pink layer measures 4 inches by 5.25 inches and was cut using a die from My Creative Time.


I used dimensional squares to attach the image and added a few small hearts from the Scallop Hearts Nests (#113263) file that I also purchased from the Silhouette on-line store. The finished card measures 5.5 inches wide x 4.25 inches tall. The stamp is from Studio G.

Thanks for stopping by and have a marvelous Monday!

Total Pageviews

 
--------- ----------