Monday, November 29, 2010

Christmas Boxes And Tags

Today I want to share with you my design project for Creative Critterz Imaginations blog.I know that many of you are going to be wrapping presents this week so I thought it would be fun to make quick and easy gift tags and an adorable box. The Imagine makes it super simple!


This tag is on page 5 of the Snow Angel Art Cartridge and cut at 6 inches. 3-D foam squares were used for dimension and a bow was added. I also added a string of pearls with mini glue dots. Super easy!


The ornament is on page 4 of the Snow Angel Art Cartridge and is cut at 7.9 inches. Note that only three layers of this cut were used. Next, I cut a scalloped circle from the shapes library at 4 inches and flood filled. 3-D foam squares were used for dimension. Lastly, I used Stickles and added a bow.


The box is on page 80 of the Wild Card cartridge and cut at fit-to-page. The snowflake is on page 24 of the Snow Angel Art Cartridge and cut at 3 inches. I cut the composite snowflake and the last three layers. I did not cut the green layer. 3-D foam squares were used for dimension. The box is flood filled using the Snow Angel cartridge. Lastly, I cut a 4 x4 inch acetate square and taped it to the top of the box. The inside liner is 4 ¼ x4 ¼ inches.


This box is made the same as the first box, except I used purchased pattern paper for the box.

Recipe:
Snow Angel
Wild Card (boxes)
Acetate (boxes)
Card stock (liners and to make second box)
Assorted ribbons from my stash, dimensionals, Star Dust Stickles, pearls and mini glue dots.

Happy Holidays!

Friday, November 26, 2010

Fab Five Friday!

Welcome to another Fab Five Friday! I hope you had a wonderful Thanksgiving and that you have a chance to pick up some of the great Black Friday bargains! Every Friday, I showcase five blogs, websites or posts that I think you will enjoy.

Here are my Fab Five for this week:

For 17 adorable and free Christmas digital stamps, be sure to visit About.com. Here is a photo of one of my favorites.

Several weeks ago I posted links to Jennifer McGuire’s first five Holiday Thinking Inking videos. She has completed three additional videos in her series as a Guest Designer, so I had to share. I love the one on Perfect Pearls and think you will too. Here is a link to week six on how to stamp on different surfaces. In week seven, she covers Perfect Pearls and week eight she demonstrates a cornucopia of different techniques.

Busy with the Cricky is at it again! Susan made an amazing 3-D Christmas house that you must see. She is one talented lady! My husband could not believe she made this North Pole house with the Cricut!

PaperCrafts Magazine posted 48 adorable Christmas Cards and projects! The good news is if you click on the photo, you will see complete instructions. You do not need to subscribe to their magazine, but you may want to after you see these projects!

Christina, from Creations with Christina made an informative YouTube tutorial on Martha Stewart’s Punch Around the Page. I just purchased my first Punch Around the Page and this video was extremely helpful.

Thanks for stopping by and hope you are having a fabulously fun Black Friday!

Wednesday, November 24, 2010

How to Make Double Sided Paper Using the Imagine

Today I want to share with you my design project for Creative Critterz Imaginations blog. In the video, I use regular white cardstock, colored card stock, and cardstock that is white on one side and colored on the other to make double sided papers.


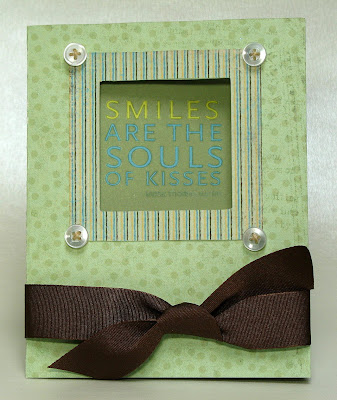
For the above card, I used card stock that is white on one side and green on the other. Detailed directions for making this card are on the video. I also made a matching envelope.

Recipe:
Imagine More Art Cartridge
Wild Card Cartridge
SEI Paper….green on one side and white on the back.
Buttons
Ribbon
Twine
Adhesive
Rub-on


Last month, I made this quick and easy card using double sided paper and just had to try it with the Imagine. It worked!

Recipe:
Imagine More Art Cartridge
Wild Card Cartridge
Bazzill paper
Kaiser Rhinestone
Ribbon
Adhesive

Thanks for visiting and have a Happy Thanksgiving!

Posted by Picasa

Monday, November 22, 2010

Oh Baby!

I made this gift card holder for a friend’s baby shower and just had to share.


The gift card is on page 7 of the Cindy Loo manual and is cut at 6 ½ inches. I love that this card has slits in it that fit most gift cards and is super simple to make. Next, I used my Imagine to make double sided paper and cut the image on page 7 of the Nursery Tails Art Cartridge. This image was cut at 4 inches and I only used four of the layers.

Lastly, I used 3-D foam squares from Scrapbook Adhesives for added dimension. If you do not have an Imagine, you could use any Cricut cut to decorate the front of this quick and easy gift card. The ribbon is from The Memory Trail, my favorite local scrapbook store.

Thanks for visiting and have a great Thanksgiving Week!

Friday, November 19, 2010

Welcome to Fab Five Friday!

Welcome to another Fab Five Friday. Every Friday, I showcase five blogs, websites or posts that I think you will enjoy. Here are my Fab Five for this week.

Two Peas in a Bucket has an amazing giveaway. Check out their site for two free digital Christmas kits. They are so cute!

Paula from More Than Favors sponsored an idea filled Imagine blog hop. Be sure to check out their great projects! I so want to make a charm bracelet. Thanks Paula!

I am a huge Regina Easter fan and admire her work. If you are looking for fun and easy ornaments, check out her blog, Hand to Paper. Her cutting files are for sale and they are super simple to use!

Samantha Casey showcases her stamping talents using the new Peachy Keen stamps. Her Christmas cards are a stamper’s dream.

I discovered a YouTube video on how to make stunning snowflakes. Monica makes elegant snowflakes using just paper! Easy and fun!

And remember, every Friday, I will be featured on the new Creative Critterz Imaginations blog. Stop over if you get a chance. My design sisters are amazing!

Thanks for stopping by and hope you are having a fabulously fun Friday!

Wednesday, November 17, 2010

Snowman Card and Gypsy Video Using Hide Contour Feature

I am so loving my new Gypsy! Below is my first Gypsy video and I am so excited. In this video, I will show you how to use the hide contour feature and also make the cute snowman card. Lately, I have been making a lot of shaped cards, but this one is my favorite.

Hope you enjoy the video!


Posted by Picasa

Monday, November 15, 2010

Tick Tock

Today I want to share with you my design project for Creative Critterz Imaginations blog.

One of the reasons that I purchased my Imagine is that I have a limited amount of time to craft, yet I want to make quick and easy cards that look like I spent a lot of time and effort on them. The Imagine allows me do this and has simplified my life! This card literally took 15 minutes to make and it was such a hit at the birthday party. Our friend was turning 40 so I just couldn’t pass up the opportunity to make a funny card. I find making cards for men challenging, but not with the Imagine More Cartridge.


Recipe:
Imagine More art cartridge
Kirkland’s professional glossy inkjet photo paper
3-D Foam Squares
Adhesive

Instructions:
The clock is on page 32 of the Imagine More manual and is cut at 5 inches. Cut two and then manually cut out the words Tick and Tock from one of the clocks. Weld two 4.8 inch circles using the George Cartridge. Next cut a 4.25 inch circle for the inside of the card and use Microsoft Word or another type of word processing program to print the sentiment. Use pop dots to give the words Tick and Tock added dimension. If you use thick glossy photo paper, be sure to increase the pressure to five and change the paper setting to glossy. Also remember to set the blade at 6.

Thanks for visiting and please stay tuned for my first Gypsy video. Hint: It involves Christmas.

Posted by Picasa

Friday, November 12, 2010

Welcome to Fab Five Friday!

Welcome to another Fab Five Friday. Every Friday, I showcase five blogs, websites or posts that I think you will enjoy. Here are my Fab Five for this week:

Gaby from Gaby Creates has out done herself with these projects. Gaby used the new SEI Moonrise Collection to create a stunning popcorn box with a lid, a piece of cake box and a beautiful origami cup. She also included great photos and instructions. Thanks Gaby!

I can’t believe it has taken me this long to discover Cooking With Cricut. This is a fun site that will give you tons of inspiration. While you are there, check out the cute hot cocoa holder and scroll down the page for more great ideas!

Diane from Capadia Designs posted an excellent tutorial on how to make snowflakes using different cartridges. She actually designs them from start to finish. If you have time, check out her other snowflake posts, including a review of the new Winter Lace cartridge.

If you are looking for stamping inspiration, be sure and visit Stampendous. Their project gallery and tips and techniques sites are amazing. If time, visit their blog too! It is worth seeing.

I fell in love with ScrapCrazyyy’s Blog. She has made a number of beautiful Christmas cards using the Imagine and the Snow Angel cartridge. I love her color and pattern choices. You will be impressed!

I would like to thank Tammy Skinner for making my Fab Five Friday even more fabulous. Every Friday, I will be featured on her new Creative Critterz Imaginations blog. Stop over if you get a chance. There are so many wonderful projects made by mega talented designers.

Thanks for stopping by and hope you are having a fabulously fun Friday!

Wednesday, November 10, 2010

Cute Kitty Card Using Photographic Matte Paper

A special thanks to all of you for your encouragement and support. I have received so many comments and emails congratulating me on being selected for the Creative Critterz Imaginations Design Team.

Today I want to share with you my initial post, in case you missed it, along with a big thanks for all your kind words! I am truly blessed to have such wonderful viewers.

For this project I used the Cindy Loo Cricut cartridge and the Nursery Tails Imagine cartridge. Kitty is cut at 5.5 inches and I used all the layers including the shadow feature. The fun thing about this card is that you can make it with your Cricut. The only difference will be in your choice of papers.

The Imagine makes it so easy to quickly match prints and solid digital papers. One of my favorite things about the Imagine is that you can change the look of your cards by simply using different type of papers.

In the video below, I include examples of cards made with regular white card stock, photo glossy paper and photo matte paper. I also demonstrate how to make the Kitty card and how to use photographic matte paper in the Imagine.


Thanks for visiting and have a great day!


Posted by Picasa

Monday, November 8, 2010

Bo Bunny Meets the Cricut Part Two

I purchased the BoBunny Olivia card kit and found that it coordinates perfectly with many of the Cricut cartridges. In late September, I posted several of the cards and decorated the inside of the cards using Cricut cuts. I finally made the remainder of the cards and just had to share.


To make the inside of this card, I used Plantin for the heart, Wild Card for the sentiment and French Manor for the key.


Thanks for visiting and have a great day!
Posted by Picasa

Friday, November 5, 2010

Welcome to Fab Five Friday!

Welcome to another Fab Five Friday. Every Friday I showcase five blogs, websites or posts that I think you will enjoy. Here are my Fab Five for this week:

As you know, I just purchased a Gypsy and I love it. Joy from Joy’s life made an easy to understand video on how to use the Gypsy photo application. Be sure and check out her blog as she has tons of great projects and tutorials! Thanks Joy.

Last week, I posted a video on how to make paper pumpkins for Thanksgiving. Check out this post from Court’s Craft to see her version of the pumpkins. They are so adorable.

Kthomdesigns filmed a video on how to use ribbon weaving to make an adorable wreath. She went a step further and made a fun card using the wreath. Too cleaver!

Lorraine from Card Creations by Lorraine made a quick and easy Thanksgiving card and envelope using the Wild Card cartridge. She also made a video! Thanks Lorraine for sharing your talents with us.

Last week I posted links to Jennifer McGuire’s first three Holiday Thinking Inking videos. She has completed two additional videos in her series as a Guest Designer so I had to share. I love the one on alcohol inks and think you will too. Here is a link to week four on using paint with your stamps and week five, alcohol inks.

Thanks for stopping by and hope you are having a fabulously fun Friday.

Thursday, November 4, 2010

Creative Critterz Imaginations Design Team

I am so excited! As you know from Monday’s post, I was chosen to be part of the Creative Critterz Imaginations Design Team. Tammy Skinner and the team are amazing and they have exciting things planned for the new Imagine blog. Today is my day to be introduced so I would be honored if you stopped over for a visit. I have a cute card and video to share with all of you. Thanks again for all your nice comments and words of encouragement. They are so important to me!

Linda

Wednesday, November 3, 2010

My Gypsy is in the House.

I am a Design Studio power user and just purchased my first Gypsy and love it. I know a lot of you just bought the Gypsy, so I thought I would list some resources that will help you get started. I learned a lot from watching their videos and visiting their blogs.

I love the new video series from Emma for Gypsy newbies. Here are the links to her first three videos explaining the basics. You will learn tons!

Part One: Calibrating your screen, menu button, creating a new design, linking your carts, etc.

Part Two: How to zoom, pan, add layer and how to use layer controls.

Part Three: Sizing and using aspect ratio.

Tammy Skinner is a Gypsy guru and her blog Creative Critters Cricut Club is a must see. She is a terrific teacher and keeps us informed on all Gypsy changes and updates. Her projects are amazing!

I am so used to working with DS on a larger screen, so I want to share my favorite Gypsy tip with you. When you are in the image queue and you need to add an image but you cannot see it clearly by just running your stylus over it … there is a simple way to enlarge the image. Click here for my tip of the day and the directions, thanks to Bug Bytes. Be sure and check out her blog as she has a ton of great information on the Gypsy.

Below is my first Gypsy project. For this card I welded two 5 inch tall cupcakes using Gypsy Wanderings. I then cut two layers one in pink and one in brown. Next, I cut two candles and flipped one so I could glue them back to back. I manually cut off the top of the pink layer and attached it to my brown layer. I added glitter and glossy accents to the flame. Super fun and easy birthday card.


Posted by Picasa

Monday, November 1, 2010

Big News

Good morning! I have some exciting news to share with you all. Tammy from Creative Critterz IMAGINATIONS has asked me to join her Design team. I am so thrilled to be part of such a great team. Can you believe it? Be sure and visit her blog and check out the rest of the team. They are so talented and amazing. Have a great day!

Gingerbread Man Card

To make this cute card, I purchased a file from SVG cuts and used my Sure Cuts A Lots program. I used glitter for added bling and cuttlebugged the hat band and tops of the boots using the swiss dots folder. For the inside of the card, I used my Signo uni-ball white pen to add the stitches This card and envelope were so quick and easy to make.

Thanks for visiting and have a wonderful day.


Posted by Picasa

Total Pageviews

 
--------- ----------